10 years of experience as a food machinery equipment manufacturer


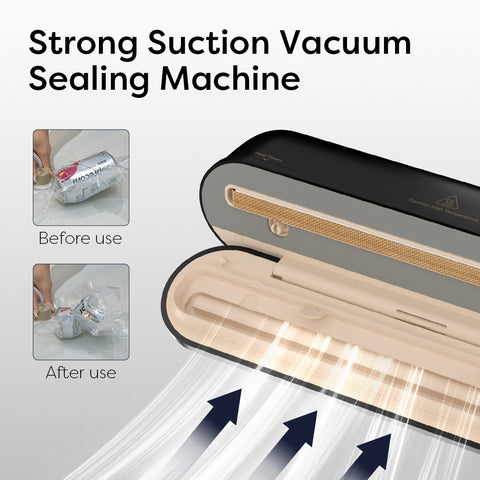
Vacuum sealing preserves food freshness by removing air from specially designed bags. Proper technique extends shelf life by up to 5 times compared to traditional storage methods. This guide details the complete process.
Begin with clean, dry items. Moisture prevents proper sealing. For liquids or moist foods like soups or marinated meats, freeze them first for 1-2 hours until solid. Cut ingredients into uniform portions to avoid sharp edges that could puncture bags. Select appropriate bag sizes allowing 2-3 inches of extra space.
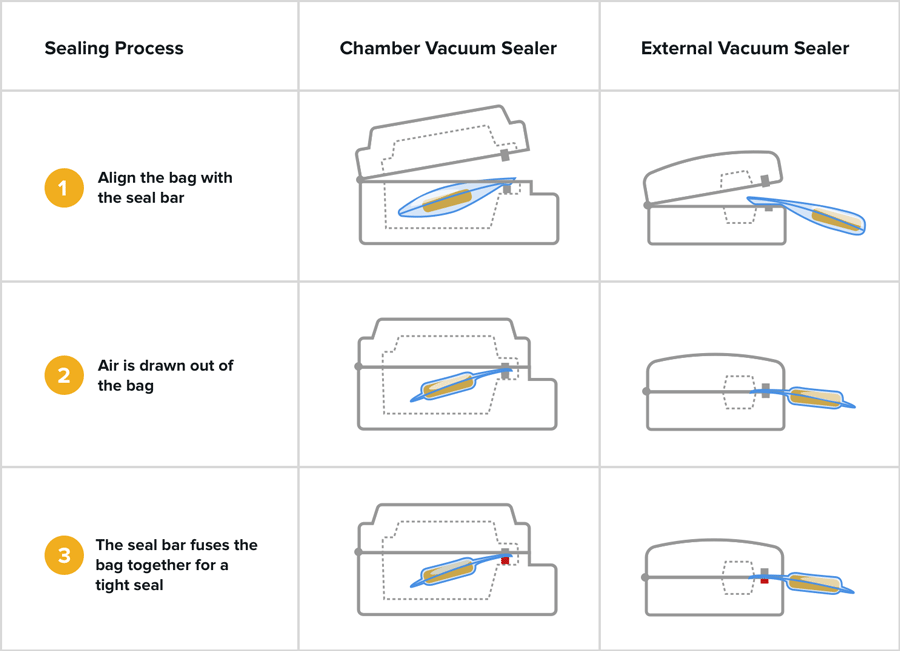
Place the vacuum sealer on a level surface. Ensure the sealing strip is debris-free by wiping with a dry cloth. For chamber machines, verify the rubber gasket is properly seated. Insert one end of the bag into the designated channel, making sure it extends beyond the heat bar. Power on the device to activate sensor indicators.
Position items near the bag’s sealed end, leaving clearance space. For delicate items like berries or baked goods, use manual mode and pause vacuuming before compression occurs. When using automatic settings:
Observe as air extracts; the bag should conform tightly to contents without wrinkles.
After vacuuming completes, the heating element activates automatically in most models. Listen for the distinctive click indicating sealing completion. Inspect seals visually: proper bonds show uniform translucent lines approximately 3mm wide. Press lightly near seams to test for air leaks.
For irregularly shaped items:
Marinating efficiency increases dramatically. Insert vacuum-sealed ingredients into marinade and run a short vacuum cycle to infuse flavors rapidly.
Sustain performance with regular upkeep: Clean heat strips after every 5-6 cycles using isopropyl alcohol. Empty liquid reservoirs promptly on chamber models. Replace vacuum bags when sealing quality diminishes. Store the device with the lid slightly open to preserve gasket integrity.
Industrial kitchens report 23% less food waste after implementing vacuum systems. Home users typically see freezer burn reduction exceeding 80%. Beyond preservation, vacuum-sealed meal preparation streamlines kitchen efficiency and maintains nutritional content better than conventional methods.
If seals fail:
For weak suction, inspect filters and ensure bag openings remain fully accessible to vacuum ports. Most performance issues resolve with proper bag placement and pressure adjustments.
Consistent vacuum sealing extends freshness dramatically while preserving texture and flavor. Whether preparing bulk purchases, sous-vide cooking, or safeguarding seasonal harvests, this technology delivers quantifiable preservation improvements with proper technique.

